
The Frustration of CGNAT and Exposed Home Networks
Six months ago, my residential ISP shifted my neighborhood subnet behind Carrier-Grade NAT (CGNAT). Overnight, all port forwarding on my home router broke. My self-hosted dev environments, internal APIs, and dedicated game servers were suddenly cut off from the internet.
When you run a homelab, seeing an RFC 6598 carrier address (100.64.0.0/10) on your WAN interface feels like hitting a brick wall. My ISP offered a static public IP for an extra $15 a month. Still, that fee did nothing to protect my residential IP from direct port scanning and denial-of-service attacks.
Cloudflare Tunnels solved inbound routing for basic web apps, but they fell short on raw TCP and UDP game traffic. Non-HTTP traffic either violated Cloudflare’s Terms of Service or required an expensive enterprise Spectrum plan. Mesh VPNs like WireGuard and Tailscale worked great on my personal laptops.
The catch? I could not reasonably ask twenty casual gaming friends to install client software and join my private mesh just to play Minecraft or Palworld. I needed an architecture that kept my local network sealed to unsolicited inbound connections while presenting a public, static IP to the world.
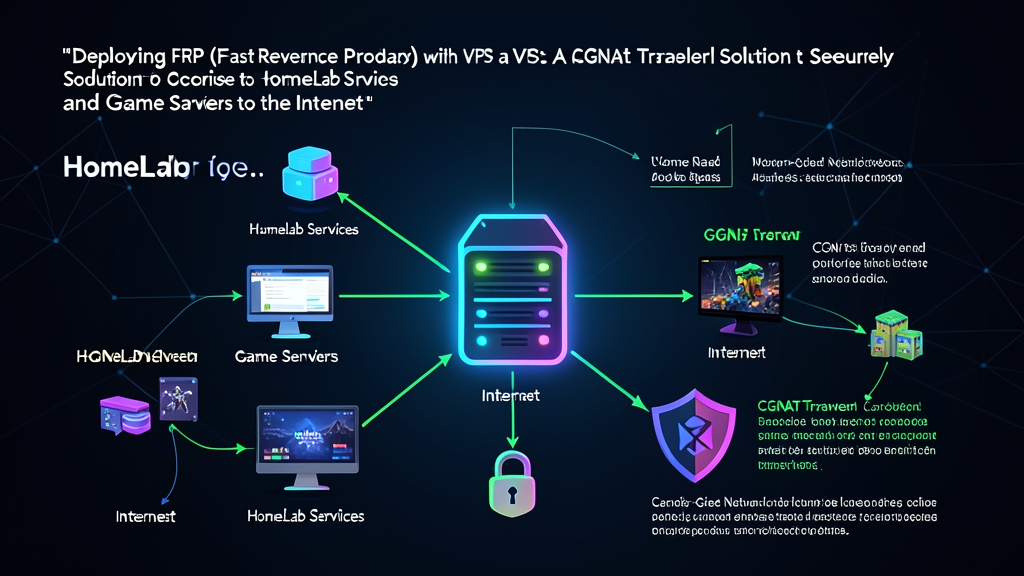
How FRP (Fast Reverse Proxy) Solves Inbound Routing
FRP is an open-source reverse proxy written in Go that routes traffic from behind NATs and firewalls to the public internet. The setup relies on two binaries. You run the server daemon (frps) on a VPS with a public IPv4 address, and the client daemon (frpc) on your local home server.
Instead of waiting for incoming traffic, frpc initiates an outbound persistent TCP connection to frps. Stateful firewalls and consumer NAT routers naturally permit established outbound connections. Because of this, packets traverse your router without custom firewall rules or UPnP holes. When an external player hits port 25565 on your VPS, frps multiplexes that stream down the active tunnel to frpc. From there, frpc hands it straight to your local container or virtual machine.
Why This Architecture Improves Security
Fronting your home connection with a $3.50 to $5 monthly VPS (from providers like Hetzner, OVH, or Linode) creates a disposable buffer zone:
- Zero Inbound Router Holes: Your home firewall drops all unsolicited incoming packets. The only active path is an outbound TCP session over a single port between your homelab and the cloud host.
- Hidden Residential IP: Gamers, web crawlers, and automated scanners only discover the cloud provider’s IP range, keeping your home address and geographic location private.
- Upstream Traffic Filtering: You can configure iptables,
ufw, Fail2ban, and SYN-flood protection right on the VPS before unwanted packets ever hit your home switch.
Hands-On Deployment: VPS and HomeLab Configuration
You will need a minimal Linux VPS (1 vCPU, 1GB RAM on Debian 12 or Ubuntu 24.04 works comfortably) and a homelab machine running Linux or Docker. FRP migrated from legacy INI files to modern TOML configuration files starting in version 0.52.0, so make sure to download the latest release from GitHub.
Step 1: Setting Up the Server (frps) on the Public VPS
Extract the release archive on your VPS, copy frps into /usr/local/bin/, and create a configuration directory at /etc/frp:
sudo mkdir -p /etc/frp
sudo nano /etc/frp/frps.toml
Add the following configuration to /etc/frp/frps.toml:
bindAddr = "0.0.0.0"
bindPort = 7000

# Authentication secret shared between client and server
auth.method = "token"
auth.token = "GENERATE_A_64_CHAR_RANDOM_SECRET_KEY"

# Optional: Local web dashboard for connection telemetry
webServer.addr = "127.0.0.1"
webServer.port = 7500
webServer.user = "admin"
webServer.password = "STRONG_DASHBOARD_PASS"
Manage the server daemon with systemd by creating /etc/systemd/system/frps.service:
[Unit]
Description=FRP Server Service
After=network.target

[Service]
Type=simple
User=nobody
Restart=on-failure
RestartSec=5s
ExecStart=/usr/local/bin/frps -c /etc/frp/frps.toml
LimitNOFILE=1048576

[Install]
WantedBy=multi-user.target
Set proper read permissions on the configuration file, reload systemd, and open port 7000 in your firewall:
sudo chmod 644 /etc/frp/frps.toml
sudo systemctl daemon-reload
sudo systemctl enable --now frps
sudo ufw allow 7000/tcp
sudo ufw reload
Step 2: Configuring the Client (frpc) on Your Home Server
Move the frpc binary to /usr/local/bin/frpc on your internal server. Next, create /etc/frp/frpc.toml. In this example, we forward a Minecraft Java server on port 25565 and an internal web API listening locally on port 8080:
serverAddr = "203.0.113.50" # Replace with your VPS public IPv4
serverPort = 7000

auth.method = "token"
auth.token = "GENERATE_A_64_CHAR_RANDOM_SECRET_KEY"

# Dedicated Minecraft Game Server
[[proxies]]
name = "game-minecraft"
type = "tcp"
localIP = "192.168.1.120"
localPort = 25565
remotePort = 25565

# Internal Web API
[[proxies]]
name = "internal-api"
type = "tcp"
localIP = "127.0.0.1"
localPort = 8080
remotePort = 18080
Set up the client service unit at /etc/systemd/system/frpc.service:
[Unit]
Description=FRP Client Service
After=network.target

[Service]
Type=simple
User=root
Restart=always
RestartSec=5s
ExecStart=/usr/local/bin/frpc -c /etc/frp/frpc.toml

[Install]
WantedBy=multi-user.target
Enable and start the client daemon:
sudo systemctl daemon-reload
sudo systemctl enable --now frpc
Remember to open the public game port on the VPS with sudo ufw allow 25565/tcp. External players can now join using 203.0.113.50:25565. Traffic flows through your VPS straight into your homelab instance without any port forwarding on your home gateway.
Step 3: Web Fronting and SSL Termination with Nginx
Never expose plaintext HTTP services like our API on remote port 18080 directly to the internet. Instead, bind it locally and terminate TLS on the VPS using Nginx and Certbot:
server {
    listen 80;
    server_name lab.yourdomain.com;

    location / {
        proxy_pass http://127.0.0.1:18080;
        proxy_set_header Host $host;
        proxy_set_header X-Real-IP $remote_addr;
        proxy_set_header X-Forwarded-For $proxy_add_x_forwarded_for;
        proxy_set_header X-Forwarded-Proto $scheme;
        proxy_http_version 1.1;
        proxy_set_header Upgrade $http_upgrade;
        proxy_set_header Connection "upgrade";
    }
}
Generate a free TLS certificate with Certbot:
sudo certbot --nginx -d lab.yourdomain.comNginx now handles TLS handshakes and forwards unencrypted traffic locally to FRP on the VPS loopback interface. From there, FRP carries it across the authenticated tunnel into your lab.
Real-World Performance: 6 Months in Production
How does this stack perform over time? Over 180 days of continuous operation, the tunnel stayed rock-solid. When my ISP lease rotated or the fiber gateway rebooted, frpc automatically re-established the tunnel within five seconds.
Latency was my primary concern for competitive gaming, but the real-world overhead was negligible. Hosting a Minecraft server with 14 concurrent players added just 2 to 4 milliseconds of round-trip ping.
Bandwidth capped out at around 12 Mbps upstream during peak map exploration. Resource consumption is remarkably lean: frps runs at roughly 28MB of RAM on the VPS, while frpc sits under 32MB on the homelab host. If your ISP has trapped your connection behind CGNAT, pairing an inexpensive VPS with FRP is one of the cleanest, most cost-effective ways to get your homelab back online.