Context & Why LocalAI Changed My Workflow
About a year ago, I was running a small internal tool that called the OpenAI API for document summarization. Nothing fancy — but every request was sending internal company data to a third-party server. The security team flagged it. Legal got involved. A simple automation had turned into a compliance problem.
That’s when I started looking seriously at LocalAI. It’s not just another self-hosted LLM runner. What sets it apart is the API: it’s drop-in compatible with OpenAI’s API — same endpoints, same request/response format. Any app already talking to api.openai.com can point to your local server with zero code changes.
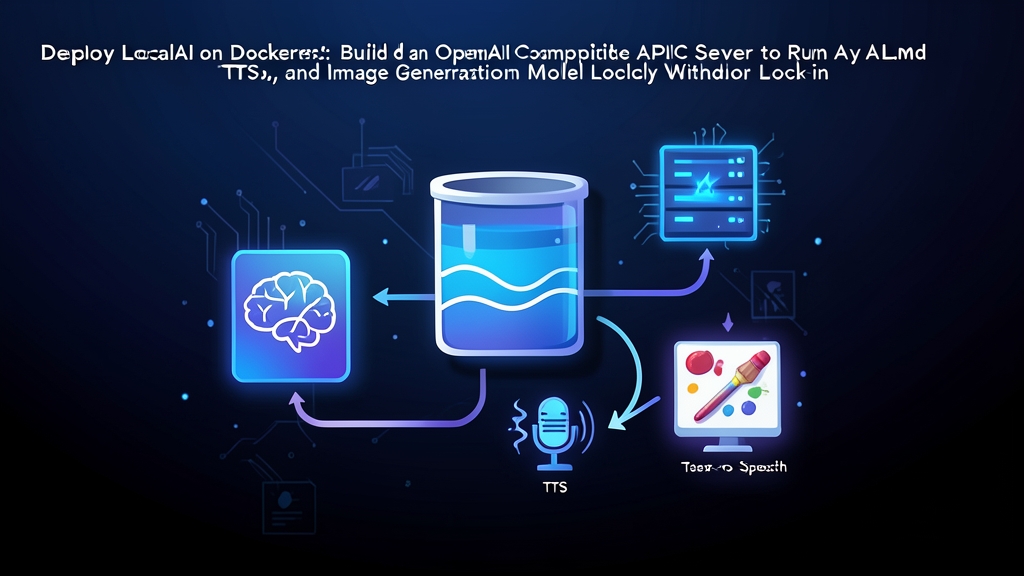
The real strength is what runs under the hood. LocalAI bundles llama.cpp, Whisper, diffusers, Bark, and Piper as backends — covering LLM inference, speech-to-text, image generation, and TTS behind one API surface. I’ve run this setup in production for several months. It holds steady under concurrent load on a mid-range server, with no crashes or memory leaks over extended uptime.
The main trade-off is hardware. Without a GPU, inference is slow. For internal tools, batch processing, or development environments, CPU inference is usually fine. And if you do have a GPU, LocalAI will use it.
Installation: Getting LocalAI Running on Docker
Prerequisites
Before you start, make sure you have:
- Docker Engine 24.0+ and Docker Compose v2
- At least 8GB RAM (16GB+ recommended for 7B models)
- 20–50GB free disk space for model files
- Optional: NVIDIA GPU with CUDA drivers installed (for GPU acceleration)
Project Directory Structure
Create a working directory with a models/ subfolder. Both model weights and their YAML configs live there:
mkdir localai-server && cd localai-server
mkdir -p models
Docker Compose Setup
Here’s the base docker-compose.yml I use in most deployments. The environment variables are worth reading before you adjust them:
services:
  localai:
    image: localai/localai:latest-aio-cpu
    # For GPU: use localai/localai:latest-aio-gpu-nvidia-cuda-12
    container_name: localai
    ports:
      - "8080:8080"
    volumes:
      - ./models:/build/models
    environment:
      - THREADS=4              # Number of CPU threads for inference
      - CONTEXT_SIZE=4096      # Max context window
      - DEBUG=false
    restart: unless-stopped
    healthcheck:
      test: ["CMD", "curl", "-f", "http://localhost:8080/readyz"]
      interval: 30s
      timeout: 10s
      retries: 5
      start_period: 60s
The aio (all-in-one) image bundles every backend in one container. If you only need LLM inference, use localai/localai:latest-cpu instead — it’s significantly smaller.
Bring it up:
docker compose up -d
docker compose logs -f
First startup pulls some base dependencies. Give it a minute or two. When you see LocalAI API is running in the logs, you’re set.
Configuration: Setting Up Models
How Model Configuration Works
LocalAI uses YAML config files stored alongside model weights in the models/ directory. Each .yaml file defines a model the API exposes — which backend to use, which weight file to load, and what parameters to apply.
Model weights — usually .gguf files for LLMs — go in the same directory. The filename you specify in YAML must match exactly; if it doesn’t, the model simply won’t load.
Configuring an LLM (Llama 3.2)
Start with a GGUF model download. Llama 3.2 3B is a practical choice for CPU inference — the Q4_K_M quantization is about 2GB on disk and handles most text tasks without a GPU:
# Download from Hugging Face (requires huggingface-cli or wget)
wget -O models/llama-3.2-3b-instruct.gguf \
  https://huggingface.co/bartowski/Llama-3.2-3B-Instruct-GGUF/resolve/main/Llama-3.2-3B-Instruct-Q4_K_M.gguf
Then create the model config at models/llama3.yaml:
name: llama3
backend: llama-cpp
parameters:
  model: llama-3.2-3b-instruct.gguf
  context_size: 4096
  threads: 4
  f16: true
template:
  chat_message: |
    {{if eq .RoleName "system"}}{{.Content}}{{end}}
    {{if eq .RoleName "user"}}User: {{.Content}}{{end}}
    {{if eq .RoleName "assistant"}}Assistant: {{.Content}}{{end}}
Adding a Text-to-Speech Model
Piper is LocalAI’s TTS backend. Create models/tts.yaml:
name: tts
backend: piper
parameters:
  model: en_US-lessac-medium.onnx
Download the Piper voice model:
wget -O models/en_US-lessac-medium.onnx \
  https://huggingface.co/rhasspy/piper-voices/resolve/main/en/en_US/lessac/medium/en_US-lessac-medium.onnx
wget -O models/en_US-lessac-medium.onnx.json \
  https://huggingface.co/rhasspy/piper-voices/resolve/main/en/en_US/lessac/medium/en_US-lessac-medium.onnx.json
Adding Image Generation with Stable Diffusion
Image generation uses the diffusers backend. Create models/stablediffusion.yaml:
name: stable-diffusion
backend: diffusers
parameters:
  model: stabilityai/stable-diffusion-2-1
f16: true
diffusers:
  pipeline_type: StableDiffusionPipeline
  cuda: false
Any change to model YAML files requires a container restart to take effect:
docker compose restart localaiVerification & Monitoring
Testing the API Endpoints
With LocalAI running, testing it looks identical to calling the OpenAI API — just change the base URL.
Start by listing what models LocalAI has loaded:
curl http://localhost:8080/v1/models | python3 -m json.toolChat completions:
curl http://localhost:8080/v1/chat/completions \
  -H "Content-Type: application/json" \
  -d '{
    "model": "llama3",
    "messages": [
      {"role": "user", "content": "Explain what a Docker volume is in one sentence."}
    ],
    "temperature": 0.7
  }'
TTS follows the same API pattern:
curl http://localhost:8080/v1/audio/speech \
  -H "Content-Type: application/json" \
  -d '{"model": "tts", "input": "Hello from LocalAI"}' \
  --output speech.mp3
Image generation:
curl http://localhost:8080/v1/images/generations \
  -H "Content-Type: application/json" \
  -d '{
    "model": "stable-diffusion",
    "prompt": "a server rack in a data center, photorealistic",
    "size": "512x512"
  }'
Using LocalAI from Python is just as direct — the OpenAI SDK works as-is, with one change:
from openai import OpenAI

client = OpenAI(
    base_url="http://localhost:8080/v1",
    api_key="not-needed"  # LocalAI doesn't require a real key by default
)

response = client.chat.completions.create(
    model="llama3",
    messages=[{"role": "user", "content": "What is Kubernetes in one paragraph?"}]
)
print(response.choices[0].message.content)
Health Checks and Log Monitoring
The readiness endpoint gives you a simple health signal — useful for load balancers or container orchestration:
curl -s http://localhost:8080/readyz
# Returns: {"status":"ok"}
For logs and resource usage:
# Follow live logs
docker compose logs -f localai

# Filter for errors only
docker compose logs localai 2>&1 | grep -i error

# Check resource usage
docker stats localai
When a model refuses to load, set DEBUG=true in your Compose file first. LocalAI logs the full backend initialization — you see exactly what it’s loading and where it fails. Missing weight files and misconfigured YAML keys show up immediately, instead of surfacing later as cryptic API errors.
Need authentication? Add API_KEY=your-secret to the Compose environment. LocalAI enforces bearer token auth across all endpoints, using the same Authorization: Bearer ... format as OpenAI. No other changes required.
If you’re already using the OpenAI SDK anywhere in your stack, switching to LocalAI is a one-line change — update the base URL. That’s what makes it worth deploying even for development environments, not just production. The Docker setup takes under 10 minutes. The API surface is immediately familiar. And from that point, your requests stop leaving the building.