Context & Why: The Multi-Environment Code Duplication Trap
Managing cloud infrastructure across dev, staging, and production starts innocently enough. You write a few Terraform files for your VPC, spin up an RDS Postgres instance, and launch an ECS cluster. But as soon as your team requires strict parity between staging and production, the cracks appear.
Standard Terraform pushes you into one of two uncomfortable compromises: workspaces or directory branching. Terraform workspaces seem simple at first glance. However, they share identical backend configs and variable schemes, making account isolation or environment-specific overrides risky.
The alternative—maintaining separate directories for dev, staging, and prod—turns into a maintenance headache. You end up copying identical backend.tf and provider.tf blocks into dozens of folders. In a setup with 15 microservices across three tiers, that can easily mean managing over 40 duplicate backend definitions.
Why does this happen? Terraform’s core design forbids dynamic variables inside backend blocks. You cannot interpolate an environment string or AWS account ID into an S3 bucket key inside a native terraform { backend "s3" {...} } definition. Because of this limitation, engineers hardcode state paths, duplicate module definitions, and manually sync provider authentication blocks.
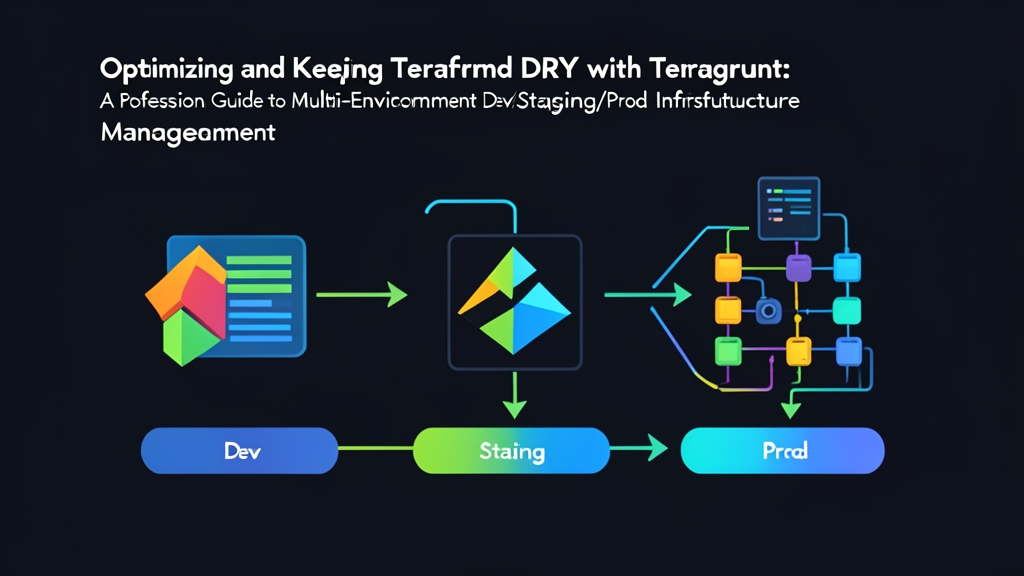
Terragrunt fixes this fundamental limitation. Acting as an orchestrator and thin wrapper for Terraform, Terragrunt enforces the DRY (Don’t Repeat Yourself) principle. Child configurations inherit their backend declarations and provider setups directly from a single root file. This layout prevents configuration drift when you deploy infrastructure across isolated AWS accounts.
Installation
Terragrunt needs an existing Terraform binary in your $PATH. We recommend pinning specific versions in production or installing the static binaries directly onto your CI/CD runner.
Step 1: Install Terraform
For Debian and Ubuntu environments, grab the official package from HashiCorp’s repository:
sudo apt-get update && sudo apt-get install -y gnupg software-properties-common curl
curl -fsSL https://apt.releases.hashicorp.com/gpg | sudo gpg --dearmor -o /usr/share/keyrings/hashicorp-archive-keyring.gpg
echo "deb [signed-by=/usr/share/keyrings/hashicorp-archive-keyring.gpg] https://apt.releases.hashicorp.com $(lsb_release -cs) main" | sudo tee /etc/apt/sources.list.d/hashicorp.list
sudo apt-get update && sudo apt-get install -y terraform=1.8.*
Step 2: Install Terragrunt
Fetch the compiled binary from Gruntwork’s GitHub repository and move it to your system binary directory:
TERRAGRUNT_VERSION="v0.58.5"
curl -L -o terragrunt https://github.com/gruntwork-io/terragrunt/releases/download/${TERRAGRUNT_VERSION}/terragrunt_linux_amd64
chmod +x terragrunt
sudo mv terragrunt /usr/local/bin/terragrunt
Confirm both tools are ready:
terraform version
terragrunt --version
Configuration: Structuring a Clean Multi-Environment Setup
To keep code DRY, divide your repository into two distinct domains. Put generic blueprints under reusable Terraform modules, and isolate environment-specific inputs and backend logic inside Terragrunt live directories.
Repository Directory Layout
Here is a clean directory pattern designed for multiple AWS accounts:
infrastructure/
├── modules/
│   └── vpc/
│       ├── main.tf
│       ├── variables.tf
│       └── outputs.tf
└── live/
    ├── terragrunt.hcl          # Root configuration (remote state & providers)
    ├── dev/
    │   ├── env.hcl             # Environment-level variables (CIDRs, tags)
    │   └── vpc/
    │       └── terragrunt.hcl  # Dev VPC deployment
    ├── staging/
    │   ├── env.hcl
    │   └── vpc/
    │       └── terragrunt.hcl
    └── prod/
        ├── env.hcl
        └── vpc/
            └── terragrunt.hcl
1. The Root Configuration (`live/terragrunt.hcl`)
The root file generates both the remote backend and AWS provider blocks on the fly using Terragrunt’s path_relative_to_include() function.
# live/terragrunt.hcl
locals {
  # Automatically load environment-level variables from child directories
  env_vars   = read_terragrunt_config(find_in_parent_folders("env.hcl"))
  env_name   = local.env_vars.locals.environment
  aws_region = "us-east-1"
}

# Centralized backend configuration
remote_state {
  backend = "s3"
  generate = {
    path      = "backend.tf"
    if_exists = "overwrite_terragrunt"
  }
  config = {
    bucket         = "mycompany-tf-state-${local.env_name}-${local.aws_region}"
    key            = "${path_relative_to_include()}/terraform.tfstate"
    region         = local.aws_region
    encrypt        = true
    dynamodb_table = "mycompany-tf-locks-${local.env_name}"
  }
}

# Dynamic AWS provider generation
generate "provider" {
  path      = "provider.tf"
  if_exists = "overwrite_terragrunt"
  contents  = <<EOF
provider "aws" {
  region = "${local.aws_region}"
  default_tags {
    tags = {
      Environment = "${local.env_name}"
      ManagedBy   = "Terragrunt"
    }
  }
}
EOF
}
2. The Environment Variables File (`live/dev/env.hcl`)
Store environment-specific values in a single file per tier rather than repeating account IDs and tags in every module:
# live/dev/env.hcl
locals {
  environment    = "dev"
  aws_account_id = "111122223333"
}
3. The Child Module Configuration (`live/dev/vpc/terragrunt.hcl`)
Notice how minimal the component configuration becomes. No backend boilerplate. No provider blocks. Just an inheritance statement and your variables.
# live/dev/vpc/terragrunt.hcl
include "root" {
  path = find_in_parent_folders()
}

terraform {
  source = "../../../modules/vpc"
}

inputs = {
  vpc_cidr             = "10.10.0.0/16"
  public_subnet_cidrs  = ["10.10.1.0/24", "10.10.2.0/24"]
  private_subnet_cidrs = ["10.10.10.0/24", "10.10.20.0/24"]
  enable_nat_gateway   = true
  single_nat_gateway   = true # Saves ~$65/month by using one NAT gateway in dev
}
To create staging or production, replicate the dev directory structure and tweak env.hcl along with your inputs. For example, flip single_nat_gateway = false in production for multi-AZ redundancy. You gain high availability without touching a single line of your core VPC module.
Verification & Monitoring
With your directory layout complete, testing infrastructure is straightforward. You can target individual components or execute commands across the entire stack.
Step 1: Validate a Single Component
Change directly into the component directory. Terragrunt sets up the remote backend, renders local provider files, retrieves the source module, and runs Terraform under the hood:
cd live/dev/vpc
terragrunt init
terragrunt plan
When the plan matches your expectations, apply the run:
terragrunt apply -auto-approveStep 2: Orchestrating Multiple Modules Safely
Modern stacks contain linked resources like VPCs, RDS instances, and EKS clusters. Terragrunt uses explicit dependency blocks to manage execution order and pass outputs seamlessly between modules:
# live/dev/app/terragrunt.hcl
dependency "vpc" {
  config_path = "../vpc"
}

inputs = {
  vpc_id     = dependency.vpc.outputs.vpc_id
  subnet_ids = dependency.vpc.outputs.private_subnet_ids
}
To inspect changes across all modules in an environment at once, trigger run-all from the environment directory:
cd live/dev
terragrunt run-all plan
Terragrunt builds a dependency graph, plans independent modules in parallel, and applies interdependent resources in strict order.
Step 3: Continuous Monitoring and Drift Detection
To detect out-of-band updates before they cause outages, run a scheduled drift detection check in GitHub Actions or GitLab CI:
# Exit code 2 signals unmanaged infrastructure drift
terragrunt run-all plan -detailed-exitcode
Centralized state definitions paired with isolated environment inputs keep your codebase clean. You eliminate brittle copy-pasting, gain auditable configuration boundaries, and build an infrastructure platform ready to scale from a single prototype to multi-region production.