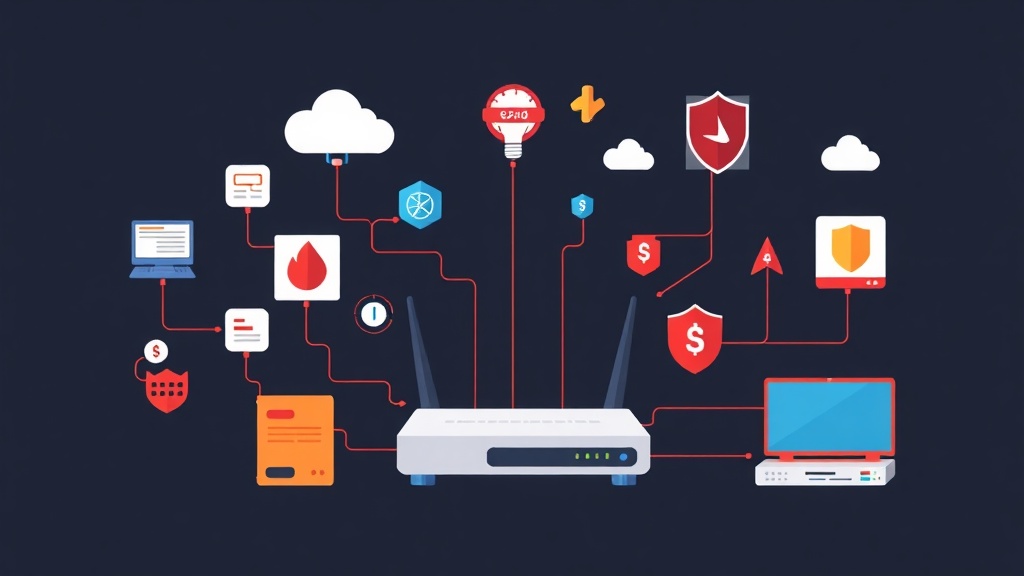
The Unseen Battle for Your Home Network
Today, nearly every home relies on a robust network. From streaming 4K movies to video calls and a growing array of smart devices, our digital lives depend on the health and security of our local network. Yet, for many, the router—the command center of this network—remains a mysterious black box provided by the ISP. These off-the-shelf units often promise simplicity but frequently deliver frustrating limitations and hidden vulnerabilities.
You’ve probably experienced it: slow Wi-Fi, constant buffering during a crucial stream, unfamiliar devices appearing on your network, or the inability to properly isolate your smart gadgets from sensitive personal data.
While convenient, consumer-grade routers often lack the granular control and robust security features a modern, secure home network truly demands. For anyone venturing into HomeLab territory, these limitations quickly become bottlenecks, stifling experimentation and compromising overall security.
Real-World Problem: The Consumer Router Conundrum
I’ve certainly been there. For years, I tolerated standard-issue routers, thinking, “It’s just home internet; how complex can it really get?” Then I began building my HomeLab. Suddenly, I needed VLANs to segment my lab environment from my family’s devices.
I wanted a VPN server for secure remote access from anywhere. I needed proper firewall rules, not just basic port forwarding, to protect my publicly exposed services. My consumer router quickly became a choke point, a constant source of frustration rather than an enabler for my projects.
The issue isn’t solely about needing advanced features. It fundamentally concerns security, performance, and control. Typical consumer devices often exhibit:
- Limited Security Features: Basic firewalls, often outdated firmware (sometimes years behind current patches), and inconsistent update cycles leave them vulnerable to common exploits.
- Lack of Granular Control: Implementing complex firewall rules, managing traffic priorities (QoS) for specific applications, or creating isolated network segments (VLANs) is often impossible or overly complicated.
- Poor Performance for Advanced Tasks: VPN throughput can be agonizingly slow, often limited to 10-20 Mbps, and managing many concurrent connections quickly overwhelms them.
- Vendor Lock-in and Unwanted Software: You’re often stuck with unnecessary features you can’t remove, and your security relies entirely on the vendor’s commitment to patching.
- Lack of Transparency: There’s no real insight into network traffic, detailed logs, or critical security events. You’re effectively flying blind.
For a HomeLab, this setup is simply unacceptable. My HomeLab hosts critical services, development environments, and sensitive data. Entrusting that to a device with opaque firmware and minimal security features felt exactly like leaving the back door wide open.
Root Cause Analysis: Why Off-the-Shelf Routers Fall Short
At its heart, the problem stems from design philosophy. Consumer routers prioritize ease of setup and mass appeal over advanced functionality, robust security, and peak performance. They are essentially appliances, not powerful network engines. Their firmware often consists of a heavily modified, stripped-down Linux kernel wrapped in proprietary web interfaces. This fundamental approach leads directly to their key shortcomings:
- Resource Constraints: Limited CPU power (e.g., single-core 600 MHz), minimal RAM (often 64MB or 128MB), and small flash storage mean they struggle to run complex network services efficiently or maintain extensive firewall rulesets.
- Proprietary Software: Closed-source firmware prevents community security audits and makes it impossible for users to add custom features or deeper optimizations.
- Infrequent Updates: Vendors frequently abandon support for older models, sometimes after just a year or two, leaving devices exposed to newly discovered threats.
- Target Audience: Since the target audience isn’t expected to be network engineers, advanced configurations are either omitted entirely or presented in an overly simplified, restrictive manner.
You simply can’t force a consumer router to achieve the network resilience, segmentation, and performance a dynamic HomeLab requires. Attempting to do so is like trying to use a screwdriver as a hammer – it might technically work in a pinch, but it’s fundamentally the wrong tool for the job, leading to inefficiency and frustration.
Solutions Compared: Finding the Right Network Brain
Once you’ve outgrown your ISP-provided router, you typically explore a few main avenues:
- High-End Consumer/Prosumer Routers: Consider brands like Ubiquiti, Synology, or more expensive Netgear/ASUS models.
- Pros: They offer better performance and introduce some advanced features (VLANs, basic VPNs), often with improved reliability.
- Cons: You’re still dealing with proprietary firmware. They can be expensive, and their feature set remains limited compared to enterprise-grade solutions. It’s still a closed ecosystem.
- Dedicated Hardware Firewalls/Appliance: Think enterprise-grade solutions such as Cisco Meraki or Fortinet.
- Pros: These provide top-tier security, unparalleled performance, and extensive features, often tailored for business environments.
- Cons: They are extremely expensive, involve complex licensing models, are often overkill for most home users, and come with a steep learning curve.
- DIY Open-Source Router/Firewall Software: Options include OpenWRT, DD-WRT, Untangle, Sophos Home, and of course, pfSense/OPNsense.
- Pros: You get ultimate control and high customizability. They are often free, benefit from active community support, and can run on standard PC hardware.
- Cons: These require dedicated hardware, and the initial setup can be more complex, demanding a steeper learning curve than simple plug-and-play devices.
Best Approach: Embracing pfSense or OPNsense for Your HomeLab
For a HomeLab environment—where flexibility, granular control, robust security, and budget are often primary concerns—pfSense and OPNsense clearly emerge as superior choices. These open-source firewall distributions are built on FreeBSD, designed specifically to transform commodity hardware into a dedicated, powerful router/firewall appliance.
Imagine them as specialized operating systems, precisely tuned for network management. They can turn a standard PC with multiple network interfaces into an enterprise-grade router and firewall, providing capabilities that vastly outperform any consumer router. While virtually identical in core functionality, OPNsense forked from pfSense, emphasizing a more modern user interface and faster release cycles.
From my personal experience, mastering this is one of the most valuable skills for anyone serious about network control and security in a HomeLab. The initial learning curve might seem challenging, but the long-term rewards are immense: unparalleled control, enterprise-level security, and the flexibility to adapt your network to virtually any future need.
What You’ll Need:
- Dedicated Hardware: This could be an old desktop PC, a compact mini-PC (like a Protectli or Qotom box), or even a virtual machine running on a hypervisor.
- CPU: A modern dual-core CPU (e.g., Intel Celeron J-series, i3/i5 or AMD equivalent) is typically sufficient for home internet speeds up to 1 Gigabit per second (Gbps).
- RAM: 4GB is a solid starting point. 8GB provides significantly more headroom, especially if you plan to run additional packages like Suricata or Snort for intrusion detection.
- Storage: An 8GB or larger solid-state drive (SSD) or even a durable USB drive is ample for the operating system and logs.
- Network Interfaces (NICs): You’ll need at least two physical Gigabit Ethernet ports. One connects to your WAN (internet) and the other to your LAN (internal network). More ports are necessary for VLANs or multiple isolated LAN segments. Intel NICs are generally recommended for their superior compatibility and performance.
- USB Drive: Essential for creating the installation media.
- Monitor and Keyboard: Required only for the initial installation process.
- Internet Connection: Naturally!
Installation: Bringing Your Network Powerhouse to Life (pfSense Example)
The installation process for both pfSense and OPNsense mirrors that of installing any standard operating system. Here’s a concise, high-level overview:
- Download the ISO: Visit the pfSense download page or OPNsense download page. Select the correct architecture (usually AMD64) and choose the appropriate installer type, such as a USB Memstick Installer.
- Create Bootable USB: Use a reliable tool like Rufus (for Windows) or balenaEtcher (for Windows, macOS, or Linux) to write the downloaded ISO file to your USB drive.
- Boot from USB: Connect the prepared USB drive, a monitor, and a keyboard to your dedicated hardware. Power it on and ensure it boots from the USB drive; you might need to adjust BIOS/UEFI settings.
- Follow the Installer Prompts:
- Accept the license agreement.
- Choose “Install” (for pfSense) or “Install OPNsense” (for OPNsense).
- Select your target disk. For most users, opting for “Auto (UFS)” or “Auto (ZFS)” is the safest approach unless you have specific partitioning requirements.
- Allow the installation to complete.
- Reboot and carefully remove the USB drive when prompted.
Once rebooted, you’ll be greeted by the console menu. This crucial step is where you’ll assign your network interfaces.
Initial Configuration: Assigning Interfaces
The console will prompt you to assign interfaces, a critical step. You must identify which physical NIC corresponds to your WAN (internet connection) and which to your LAN (internal network).
Example console output:
Should VLANs be set up now? [y|n|a]: n
Enter the WAN interface name or 'a' for auto-detection
(vtnet0 vtnet1): vtnet0
Enter the LAN interface name or 'a' for auto-detection
(vtnet1): vtnet1
Enter the optional 1 interface name or 'a' for auto-detection
(n or nothing if finished): n
In this common example, vtnet0 is assigned to WAN and vtnet1 to LAN. Your specific interface names might vary (e.g., igb0, em0, re0), depending on your hardware. If you’re uncertain, try unplugging and re-plugging network cables to observe which interface link state changes, or run ifconfig from the shell (option 8 on the main menu) to inspect MAC addresses and identify them by their physical hardware addresses.
After assigning interfaces, pfSense/OPNsense typically configures the LAN interface with a default IP address (e.g., 192.168.1.1/24) and automatically starts a DHCP server. Connect any computer to the LAN port of your new firewall appliance, and it should immediately receive an IP address.
Accessing the Web Interface:
Open your web browser and navigate to the LAN IP address (for instance, http://192.168.1.1). The default login credentials are:
- pfSense: Username
admin, Passwordpfsense - OPNsense: Username
root, Passwordopnsense
For immediate security, change these default passwords without delay!
Key Features and Configuration Examples:
With your new router/firewall now operational, we’ll explore some of its most powerful capabilities and how to configure them.
Firewall Rules: Your Network’s Bouncer
This is where pfSense/OPNsense truly excels. You gain the power to create highly specific rules that meticulously control traffic flow both entering and exiting your network, as well as between different internal segments (VLANs).
Consider this example: You want to block all outgoing traffic from your IoT VLAN to your main LAN, with the sole exception of specific ports required by a Home Assistant server. This level of precision is simple to achieve.
Navigation: Firewall > Rules
Remember that rules are processed from top to bottom. A common, effective strategy includes:
- Aliases: Group related IPs, ports, or networks for vastly simplified management and readability.
- Floating Rules: Apply rules globally across all interfaces for broad policy enforcement.
- Interface-Specific Rules: These are the most common and are applied directly to particular interfaces like WAN, LAN, or your various VLANs.
For instance, to allow your IoT devices (residing on a VLAN10 interface) to reach a specific Home Assistant server (IP 192.168.1.50) on port 8123, while blocking all other traffic from IoT to your main LAN, you would create a rule on the VLAN10 interface:
- Action: Pass
- Interface: VLAN10
- Address Family: IPv4
- Protocol: TCP
- Source: VLAN10 net (the entire subnet of VLAN10)
- Destination: Single Host or Network (
192.168.1.50) - Destination Port Range: From
8123to8123
Immediately following this, you’d add a deny-all rule to block any other traffic attempting to cross from VLAN10 to your main LAN, ensuring strict isolation.
VLANs: Segmenting Your Network
VLANs (Virtual Local Area Networks) are crucial for logically separating your network traffic even when using a single physical switch. This capability is paramount for HomeLab security, enabling you to isolate IoT devices, guest Wi-Fi networks, and your lab environments from your primary, trusted devices.
Navigation: Begin at Interfaces > VLANs, then proceed to Interfaces > Assignments
First, you’ll create the VLANs on your physical parent interface (e.g., your primary LAN NIC). Next, assign these newly defined VLANs as distinct interfaces and configure their unique IP addresses along with their own DHCP servers.
Using vtnet1 as your LAN interface as an example:
- Navigate to
Interfaces > VLANsand click the+Addbutton. - Set the
Parent Interfacetovtnet1. - Enter a specific
VLAN Tag(e.g.,10for IoT devices,20for Guest Wi-Fi). - Provide a clear
Description(e.g.,IoT Network). - Move to
Interfaces > Assignments. Here, you’ll see your newly created VLANs listed underAvailable network ports. - Click
+Addto assign them as new logical interfaces (they might appear asOPT1,OPT2, etc.). - Finally, enable and configure each new interface, assigning a static IP address (e.g.,
192.168.10.1/24for your IoT VLAN) and activating its dedicated DHCP server.
A critical reminder: your physical network switch must also be VLAN-aware and correctly configured to tag packets on the ports connected to your pfSense/OPNsense box and your Wi-Fi access points for this setup to function.
VPN Server: Secure Remote Access
Whether your goal is secure access to your HomeLab from outside your network or encrypting your internet traffic while using public Wi-Fi, pfSense/OPNsense can host powerful VPN servers supporting protocols like OpenVPN or WireGuard.
Navigation: VPN > OpenVPN (or VPN > WireGuard if that package is installed)
Setting up OpenVPN typically involves several steps: establishing a Certificate Authority, generating server and user certificates, and then configuring the OpenVPN server itself. This is a multi-step, but well-documented, process. WireGuard, in contrast, offers significantly simpler configuration.
This functionality allows you to create a secure tunnel into your home network from anywhere in the world, safeguarding your privacy and granting access to your local services as if you were physically present.
Package Management: Extending Functionality
Both pfSense and OPNsense feature robust package managers, allowing you to significantly extend their core functionality with powerful add-ons:
- pfBlockerNG (pfSense) / Zenarmor (OPNsense): These provide advanced DNS-based ad/malware blocking and GeoIP filtering capabilities.
- Suricata/Snort: These are Intrusion Detection/Prevention Systems (IDS/IPS) for real-time threat detection and network protection.
- Squid: A versatile web proxy, useful for caching frequently accessed content and implementing content filtering policies.
- Telegraf / Prometheus Exporter: Essential for integrating your firewall’s metrics with monitoring systems like Grafana, providing deep insights into network performance.
Navigation: System > Package Manager > Available Packages
Installing a new package is generally straightforward: typically, you just click “Install” and then configure the new feature through its dedicated menu entry.
Example: Checking Network Connectivity from the Shell
Sometimes, troubleshooting requires direct command-line diagnostics. If you need to drop into the shell (select Option 8 from the console menu), here are a couple of invaluable commands:
# Check network interfaces and their assigned IP addresses
ifconfig -a

# Ping an external host to verify WAN (internet) connectivity
ping 8.8.8.8

# Ping an internal host to confirm LAN connectivity within your network
ping 192.168.1.100
Conclusion: Taking Control of Your Digital Frontier
Transitioning from a consumer-grade router to a dedicated pfSense or OPNsense appliance represents a substantial upgrade for any HomeLab enthusiast. It effectively transforms your network from a basic internet gateway into a sophisticated, secure, and highly customizable platform.
While the initial setup might demand a bit more effort and a deeper understanding of networking concepts, the long-term benefits are immense.
You gain unparalleled control over your network’s traffic, the ability to implement enterprise-level security measures, and the flexibility to build a truly robust foundation for all your HomeLab projects. This journey will deepen your networking knowledge, and it’s one I wholeheartedly recommend for anyone looking to truly professionalize their home IT infrastructure.