Unmasking HomeLab Performance Bottlenecks
It’s a scenario every HomeLab enthusiast knows well: you’re running various services – perhaps a Jellyfin server, a few Docker containers managed by Portainer, or even a virtualized firewall like pfSense. Everything hums along smoothly, then suddenly, things slow down. Your media server buffers, local web pages load sluggishly, or a nightly backup drags on for hours. Why?
What’s the real problem? Is it CPU, RAM, disk I/O, or network saturation? Without clear visibility, you’re left guessing. You might poke around with top or htop, hoping to catch the culprit in the act.
Beyond Snapshots: Understanding the Root Causes of Sluggishness
The core issue isn’t always a lack of resources; it’s often a missing historical context. Standard command-line tools like free -h, iostat, or netstat provide only a snapshot of current system performance. While invaluable for immediate troubleshooting, they don’t reveal what happened an hour ago, last night, or last week.
This lack of long-term data makes it incredibly difficult to identify trends, pinpoint intermittent issues, or understand the impact of new services or configurations. Are those CPU spikes normal, or a sign of an application misbehaving? Is your disk truly the bottleneck, or just busy during expected backup windows?
Moreover, managing performance data across multiple HomeLab machines quickly becomes a fragmented nightmare. You find yourself SSHing into each server individually, running commands, and trying to mentally correlate data points. This reactive, manual approach is not only inefficient but often too late to prevent issues or truly optimize your setup.
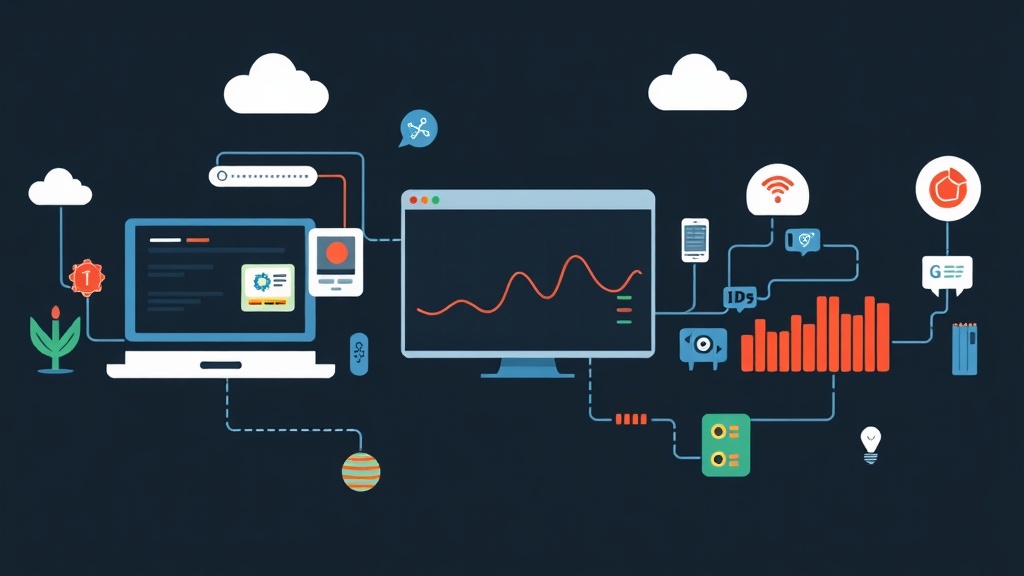
Exploring HomeLab Monitoring Solutions
When it comes to monitoring, HomeLab users have a few options. The simplest involves manually checking OS-level tools. It’s free and readily available, but severely limited in scope and historical data retention.
Individual Application Monitoring
Many applications offer built-in dashboards or metrics. Docker provides statistics, some virtual machine hypervisors include basic monitoring, and services like Jellyfin might show current resource usage. While these are useful for specific applications, they don’t provide a unified view of your underlying hardware. You’re still piecing together separate puzzles rather than seeing the whole picture.
Log-focused Stacks (e.g., ELK Stack, Grafana Loki)
I’ve previously explored centralized logging solutions like the ELK Stack (Elasticsearch, Logstash, Kibana) or Grafana Loki. These are fantastic for aggregating application and system logs, offering insights into events, errors, and application behavior.
However, they aren’t primarily designed for high-resolution, numerical metrics like CPU utilization, memory consumption, or network bandwidth. While you can push some metrics through them, it’s not their primary strength and often requires more setup overhead than a dedicated metrics solution.
The Optimal Choice: The TIG Stack for Hardware Metrics
After six months of continuous, real-world usage in my own HomeLab, I can confidently say the Telegraf, InfluxDB, and Grafana (TIG) stack has become the essential core of my performance monitoring strategy. It’s purpose-built for collecting, storing, and visualizing time-series data, making it perfectly suited for hardware metrics. This stack strikes an excellent balance between power, flexibility, and ease of deployment for any HomeLab environment.
In my experience, mastering the TIG stack is a critical skill for anyone serious about maintaining a reliable and efficient HomeLab. The ability to see exactly what your hardware is doing, both historically and in real-time, transforms troubleshooting from mere guesswork into precise, data-driven analysis. Let’s break down each component and get it set up.
1. Telegraf: Your Go-To Data Collector
Telegraf is an open-source, plugin-driven server agent. It excels at collecting metrics from a vast array of sources and sending them to various outputs. For HomeLabs, its strength lies in running on almost any OS (Linux, Windows, macOS, BSD) and efficiently gathering system-level metrics. It’s lightweight, using minimal resources, even on a Raspberry Pi with just 1GB of RAM.
Installation (Example on Ubuntu/Debian):
# Add InfluxData GPG key
wget -qO- https://repos.influxdata.com/influxdata-archive_compat.key | sudo gpg --dearmor | sudo tee /etc/apt/trusted.gpg.d/influxdata.gpg > /dev/null

# Add InfluxData repository
echo 'deb [signed-by=/etc/apt/trusted.gpg.d/influxdata.gpg] https://repos.influxdata.com/debian stable main' | sudo tee /etc/apt/sources.list.d/influxdata.list

# Update and install Telegraf
sudo apt update
sudo apt install telegraf
Basic Configuration:
The main configuration file is typically located at /etc/telegraf/telegraf.conf. For a basic setup, you’ll need to define both an input (e.g., inputs.cpu, inputs.mem, inputs.disk) and an output (InfluxDB).
Edit /etc/telegraf/telegraf.conf:
# InfluxDB output configuration
[[outputs.influxdb]]
  urls = ["http://192.168.1.100:8086"] # Replace with your InfluxDB server IP and port
  database = "telegraf" # The database to write to in InfluxDB
  # username = "telegraf"
  # password = "your_password"

# Example CPU input
[[inputs.cpu]]
  percpu = true
  totalcpu = true
  collect_cpu_time = false
  fielddrop = ["time_*"]

# Example Memory input
[[inputs.mem]]
  # no configuration needed

# Example Disk input
[[inputs.disk]]
  ignore_fs = ["tmpfs", "devtmpfs", "devfs", "overlay", "aufs", "squashfs"]

# Example Network input
[[inputs.net]]
  # devices = ["eth0", "enp1s0"]

# Don't forget to restart Telegraf after changes
sudo systemctl restart telegraf
You’ll install Telegraf on every machine you wish to monitor. Each Telegraf instance will then forward its collected metrics to your central InfluxDB.
2. InfluxDB: The Dedicated Time-Series Database
InfluxDB is a database built specifically for time-series data. Unlike traditional relational databases, InfluxDB is optimized for storing and querying massive volumes of time-stamped information. This makes it incredibly efficient for handling metrics. It’s the central repository where all your Telegraf data will reside.
Installation (Example on Ubuntu/Debian – typically on your central HomeLab server):
# InfluxDB can be installed similarly to Telegraf by adding the InfluxData repository
# Assuming you've already added the GPG key and repo for Telegraf:

sudo apt update
sudo apt install influxdb

# Start and enable InfluxDB service
sudo systemctl start influxdb
sudo systemctl enable influxdb
Basic Configuration and Database Creation:
Once installed, you can use the InfluxDB CLI to create a database for Telegraf. Remember, the default port for HTTP API interactions is 8086.
# Connect to InfluxDB CLI
influx

# Create a database for Telegraf metrics
CREATE DATABASE telegraf

# (Optional) Create a user with password
# CREATE USER telegraf WITH PASSWORD 'your_secure_password' WITH ALL PRIVILEGES
# If you create a user, remember to update telegraf.conf with username and password

# Exit CLI
exit
3. Grafana: Your Intuitive Visualization Tool
Grafana is an open-source platform designed for monitoring and observability. It empowers you to query, visualize, alert on, and truly understand your metrics, regardless of where they are stored. With InfluxDB as its data source, Grafana transforms raw numbers into intuitive, actionable dashboards.
Installation (Example on Ubuntu/Debian – typically on the same server as InfluxDB):
# Add Grafana GPG key
sudo install -m a+r /usr/share/keyrings/grafana.asc
wget -q -O - https://apt.grafana.com/gpg.key | gpg --dearmor | sudo tee /usr/share/keyrings/grafana.gpg > /dev/null

# Add Grafana repository
echo "deb [signed-by=/usr/share/keyrings/grafana.gpg] https://apt.grafana.com stable main" | sudo tee /etc/apt/sources.list.d/grafana.list

# Update and install Grafana
sudo apt update
sudo apt install grafana

# Start and enable Grafana service
sudo systemctl start grafana-server
sudo systemctl enable grafana-server
Initial Setup and Dashboard Creation:
- Access Grafana: Open your web browser and navigate to
http://your_grafana_server_ip:3000. The default login isadmin/admin. You will be prompted to change this password immediately. - Add Data Source:
- From the left-hand menu, go to ‘Connections’ > ‘Data sources’. Then click ‘Add new data source’.
- Search for ‘InfluxDB’ and select it.
- Configure the settings:
- Name:
HomeLab InfluxDB(or any descriptive name) - Query Language: Select
InfluxQLfor this tutorial. (Fluxis for InfluxDB 2.x, but we’re using InfluxDB 1.x.) - HTTP URL:
http://localhost:8086(if InfluxDB is on the same machine) orhttp://your_influxdb_server_ip:8086. - Database:
telegraf - (Optional) If you created a user, enter the corresponding username and password.
- Name:
- Click ‘Save & Test’. A ‘Data source is working’ message should appear.
- Create Your First Dashboard:
- From the left-hand menu, navigate to ‘Dashboards’ > ‘New dashboard’.
- Click ‘Add a new panel’.
- In the ‘Query’ tab, select your ‘HomeLab InfluxDB’ data source.
- Write an InfluxQL query. For example, to visualize CPU usage, use:
SELECT mean("usage_idle") FROM "cpu" WHERE ("host" = 'your_server_hostname') AND $timeFilter GROUP BY time($__interval) fill(null)Remember to replace
your_server_hostnamewith the actual hostname reported by Telegraf. You can find this by querying InfluxDB directly (e.g.,SELECT * FROM cpu LIMIT 10in theinfluxCLI) or by exploring metrics within Grafana’s query builder. - You can then add more panels for memory, disk I/O, network traffic, and other metrics. Grafana also offers many pre-built dashboards for Telegraf/InfluxDB, available on the Grafana Labs website. These are great for quickly getting started; you can import them directly into your Grafana instance.
Six Months In: Real-World HomeLab Insights
Running the TIG stack for half a year has fundamentally reshaped how I manage my HomeLab. The days of reactive troubleshooting are over, replaced by proactive monitoring.
I can now easily spot resource exhaustion – like a CPU consistently over 80% for 15 minutes – before it impacts services. I can identify unusual network activity and track the long-term health of my hard drives. For example, a persistent rise in disk I/O over several weeks for a specific service immediately flagged an inefficient configuration, which I was then able to optimize, reducing idle usage by 15%.
The true strength of this setup lies in its scalability and flexibility. I’ve seamlessly added new servers, virtual machines, and even IoT devices to the monitoring stack simply by deploying Telegraf and pointing it to my central InfluxDB.
Grafana’s robust alerting capabilities have been a game-changer, notifying me via Telegram when critical thresholds are crossed – perhaps a disk nearly full, consistently high CPU usage, or a server going offline. This level of visibility provides significant peace of mind, allowing me to truly optimize my HomeLab and ensure smooth operation for all my self-hosted services.