When a Partition Won’t Mount and the System Panics
Last year, one of my VPS instances failed to reboot cleanly after a kernel update. The boot process stalled with a kernel panic, complaining about a corrupted ext4 filesystem on /dev/sda2. After managing 10+ Linux VPS instances over 3 years, I learned to always test recovery procedures thoroughly before applying them to production — and that preparation saved me that day.
Corrupted filesystems aren’t a rare edge case. Sudden power cuts, failed kernel upgrades, hardware write errors, or even an abrupt shutdown -r now during disk I/O can all leave your ext4 partition in an inconsistent state. Linux ships with tools built specifically to detect and fix these problems.
This guide breaks down the two main tools — fsck and e2fsck — compares when to use each, and shows you exactly how to recover a corrupted partition without making things worse.
Root Causes: Why Does Filesystem Corruption Happen?
Before reaching for repair tools, it helps to understand what you’re fixing:
- Dirty unmount — power loss or kernel crash while writes were in flight. The journal wasn’t flushed cleanly.
- Bad sectors — physical storage degradation causing partially completed writes that leave blocks in an undefined state.
- Bitmap mismatch — the inode or block usage bitmaps no longer match the actual allocation state.
- Superblock corruption — the primary superblock (filesystem metadata) got overwritten or zeroed out.
- Orphaned inodes — files deleted while open, leaving inodes with no directory entry pointing to them.
Each root cause calls for a slightly different repair strategy, which is why knowing the difference between fsck and e2fsck matters.
Approach Comparison: fsck vs e2fsck vs debugfs
Three tools handle ext2/ext3/ext4 filesystem recovery. Each serves a distinct role — grabbing the wrong one first can cost you time and make recovery harder.
fsck (Filesystem Consistency Check)
fsck is the frontend dispatcher. When you run fsck /dev/sda2, it detects the filesystem type and delegates to the appropriate backend — for ext4, that’s e2fsck. It’s the right entry point when scripting checks across multiple partitions with mixed filesystem types.
e2fsck (ext2/ext3/ext4 specific)
e2fsck is the actual workhorse for the ext family. It works directly on filesystem structures and runs five checking passes: inodes/blocks/sizes, directory structure, directory connectivity, reference counts, and group summary information. Running e2fsck directly — rather than going through the fsck wrapper — gets you more detailed per-pass output and finer control over repair behavior.
debugfs (Interactive recovery)
debugfs is not a repair tool — it’s a low-level filesystem debugger. Reach for it when e2fsck hits a wall: corruption too severe to fix automatically. At that point, you can manually reconstruct the directory tree or pull specific files out before the partition becomes completely unreadable.
Pros and Cons of Each Approach
fsck
- Pros: Simple syntax, auto-detects filesystem type, convenient for shell scripts
- Cons: Hides e2fsck detail, less control over repair behavior, error messages are generic
e2fsck
- Pros: Full control, detailed per-pass output, supports backup superblock recovery, handles journal replay
- Cons: ext-family only, requires knowing the filesystem type upfront
debugfs
- Pros: Can extract files from severely broken filesystems, read-only mode available
- Cons: Manual and complex, easy to make things worse if you don’t know what you’re looking at
Day-to-day recovery: use e2fsck directly. Pull out debugfs only when e2fsck alone can’t get the job done.
Recommended Setup Before You Start
Running fsck on a mounted filesystem is dangerous and will corrupt data further. Three things to confirm before you start:
- Take a disk image first — if the data matters, clone the partition before attempting any repair.
- Unmount the filesystem — fsck requires the partition to be unmounted. For root partitions, boot from a live USB or use a rescue environment.
- Note your backup superblock locations — ext4 stores backup superblocks at known offsets. You’ll need these if the primary superblock is corrupted.
To image the partition before touching it:
# Clone the partition to a safe location (external disk, NFS, etc.)
dd if=/dev/sda2 of=/mnt/backup/sda2.img bs=4M status=progress

# For drives with bad sectors, use ddrescue (better error handling)
apt install gddrescue
ddrescue -d -r3 /dev/sda2 /mnt/backup/sda2.img /mnt/backup/sda2.log
Find backup superblock locations for your partition before anything goes wrong:
dumpe2fs /dev/sda2 | grep -i "superblock"
# Output: Backup superblock at 32768, 98304, 163840 ...
Implementation Guide
Step 1: Identify the Filesystem and Check Status
# List all partitions with filesystem types
lsblk -f

# Check current mount status
mount | grep sda2

# Get detailed filesystem info
dumpe2fs -h /dev/sda2 | head -40
Look for Filesystem state: not clean in the dumpe2fs output — that confirms the filesystem was not unmounted cleanly and needs a check.
Step 2: Unmount the Filesystem
# Unmount a non-root partition
umount /dev/sda2

# If it's busy, find what's using it
fuser -km /dev/sda2
lsof | grep sda2
Root partitions can’t be unmounted while the system is running. Boot from a live Ubuntu or Debian USB. If you can still reach a shell via single-user mode:
# Remount root as read-only before running fsck
mount -o remount,ro /
Step 3: Run e2fsck
# Basic check with automatic repair (answers yes to all prompts)
e2fsck -y /dev/sda2

# Verbose output showing each pass
e2fsck -v -y /dev/sda2

# Force check even if filesystem appears clean
e2fsck -f /dev/sda2

# Check and show progress bar
e2fsck -C 0 /dev/sda2
The -y flag is convenient for unattended recovery — but watch the output afterward. It accepts every repair proposal automatically. That’s usually fine, but on severely corrupted filesystems it can delete data that might have been recoverable with manual intervention.
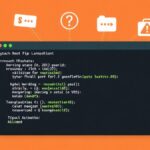
Step 4: Recover from a Corrupted Superblock
If e2fsck reports bad magic number in super-block, the primary superblock is gone. Use a backup:
# Show what superblock positions would be created (does NOT format)
mke2fs -n /dev/sda2

# Run e2fsck with a specific backup superblock
e2fsck -b 32768 /dev/sda2

# If 32768 doesn't work, try the next backup location
e2fsck -b 98304 /dev/sda2

# You can also restore the primary superblock from backup
e2fsck -b 32768 -B 4096 /dev/sda2
Step 5: Extract Files from a Severely Corrupted Partition
When e2fsck can’t repair the partition automatically, debugfs lets you pull files out before the data is permanently lost. Always open in read-only mode first:
# Open the partition read-only
debugfs -c /dev/sda2

# Inside debugfs interactive shell:
debugfs> ls /home/user
debugfs> dump /home/user/important.db /tmp/important.db
debugfs> stat /home/user/important.db
debugfs> quit
Deleted files specifically? extundelete handles that better than debugfs — but run it before e2fsck. Once fsck modifies the inode tables, deleted file recovery chances drop significantly.
# Install and recover deleted files before running fsck
apt install extundelete
extundelete /dev/sda2 --restore-all --output-dir /mnt/recovered
Step 6: Verify the Repair
# Run e2fsck again — should come back clean
e2fsck -f /dev/sda2

# Confirm filesystem state
dumpe2fs -h /dev/sda2 | grep "Filesystem state"
# Should show: Filesystem state: clean

# Remount and verify
mount /dev/sda2 /mnt/test
ls /mnt/test
dmesg | tail -20   # Look for any new errors after mount
Preventing Future Corruption
After going through this process on a production server at 2am — not an experience I’d recommend — I added these to my standard VPS setup:
# Set filesystem check interval (every 30 mounts or 3 months)
tune2fs -c 30 -i 3m /dev/sda2

# Add noatime to fstab to reduce unnecessary write frequency
# /dev/sda2  /data  ext4  defaults,noatime  0 2

# Monitor disk health weekly
apt install smartmontools
systemctl enable smartd
smartctl -a /dev/sda        # Full SMART report
smartctl -t short /dev/sda  # Quick health test
The goal isn’t to become a filesystem recovery expert — it’s to never need these tools on data that matters. Regular snapshots, RAID or replication for critical data, and disk SMART monitoring will keep you out of the 2am recovery situation. That beats having a list of repair commands memorized.
That said, when a filesystem does go bad, e2fsck -b 32768 with a backup superblock has saved my data more than once. Keep the commands handy and always image the partition before you touch anything.